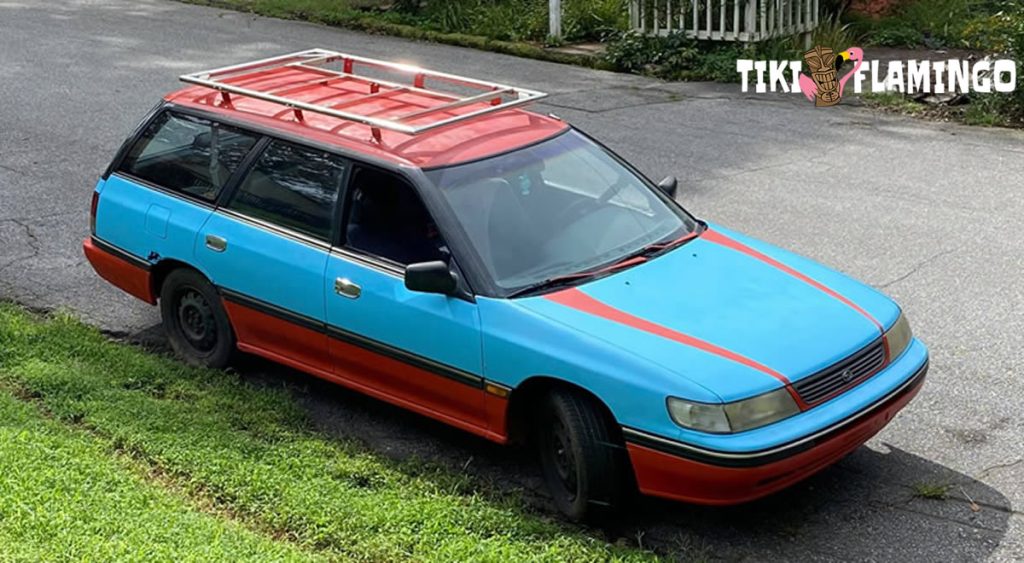
One of the most common questions I get about my 1993 Subaru Legacy art car is “Where did you get that cool chrome roof rack?” The answer I give always brings raised eyebrows, so I thought I would share the story (and a quick “how to”) here on the Athens Rally Team website.
They say that necessity is the mother of invention and there have never been truer words for anyone owning an art car. In my case, when I was building my spy car, I planned on using it for both fun and work, so a roof rack was at the top of my list of modifications. But this is an art car. I didn’t want to run out and buy some aftermarket roof rack or even source an OEM one from a junkyard. I wanted something unique.
I spent weeks trying to think of something creative I could use for a roof rack and nothing I thought of seemed to fit the art car aesthetic I was going for, or was going to be functional enough for my needs. But then, one day I was driving along and there it was on the side of the road – the perfect art car roof rack.
A New Use for an Old Couch
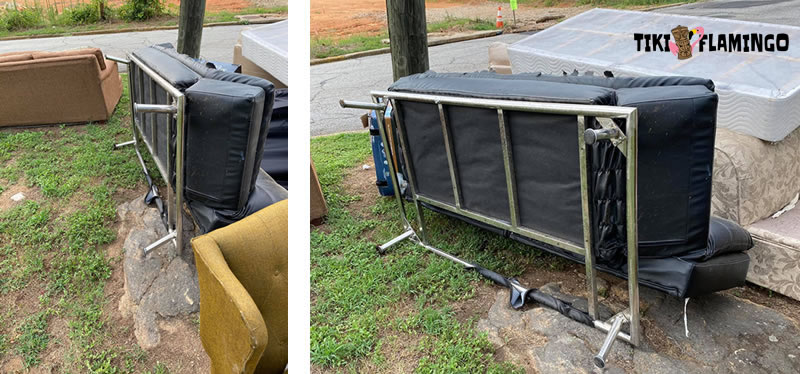
I didn’t see it at first. I mean, I did see the pile of used furniture, but I didn’t see the potential laying there. I made it all the way home before I realized the solution for my art car conundrum was sitting on the side of the road down the street from me.
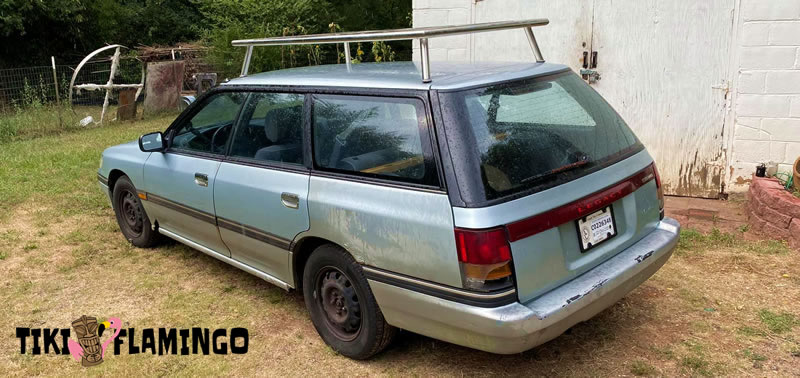
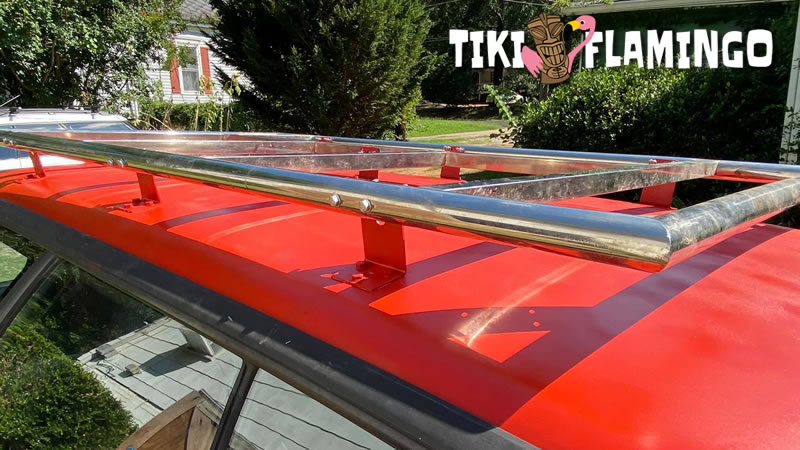
I grabbed some tools, hopped back in the car, and raced back to the pile of discarded furniture. Once I freed the chrome couch base from the crappy vinyl soft parts, I set the frame on the roof of my car. It was a perfect fit.
Turning a Chrome Couch Frame into a Stout and Functional Roof Rack
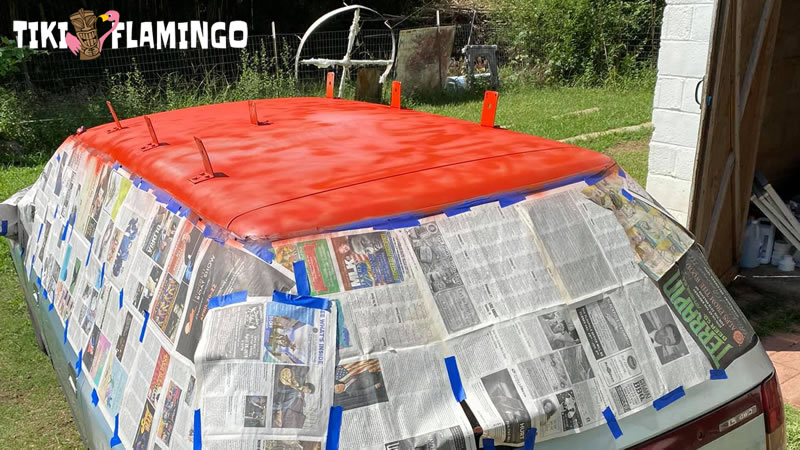
After playing around with the fitment of the couch frame, I determined that the legs were too tall and had to go. To suspend the couch frame above the roof of the car, I found some stout “L” brackets at Lowes and also some appropriate stainless hardware. I also bought a bunch of carbide drill bits. If you’ve ever tried to drill through chrome-plated steel, you know how difficult it is. The fourteen holes I drilled through that couch frame destroyed three decent quality carbide bits!
After bolting the “L” brackets to the couch frame and removing the headliner from the car, I moved the rack around to find the best possible placement where the feet of the rack would intersect with the ribs of the car roof. I bent the “L” brackets where necessary to best follow the curved roof line of the car. Once I had everything sitting where I wanted, I marked the roof and removed the “L” brackets from the frame.
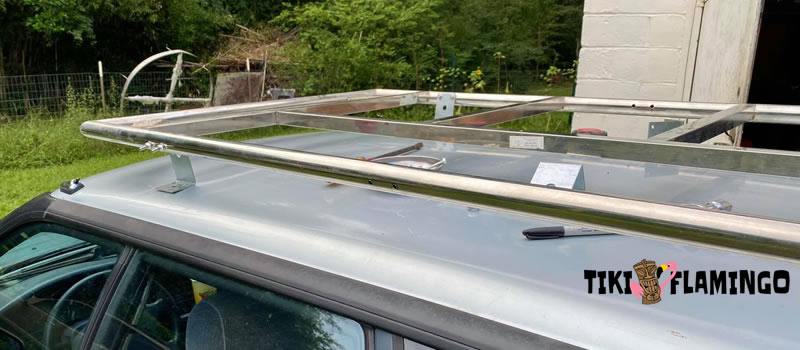
The next step was drilling out the roof and bolting on the “L” brackets. For mounting bolts that didn’t go through the roof ribs, I used large fender washers to spread the load. I used a heavy dose of silicone to help seal all the holes – not that leaks are a worry in my rusty old car.
With the “L’ brackets in place, it was time for paint. After a coat of primer and a few coats of red spray paint, I bolted the couch frame back on and stepped back to admire the repurposed chrome couch frame that now adorned my art car.
The rack has not only been stylish, but extremely useful. It has supported everything from piles of lumber to a large Halloween decoration. Much more is planned for it, so I’ll update this article as my roof rack evolves.
Keep scouring the side of the road for awesome art car parts and always keep it weird!